-2.png?height=120&name=EDITED%20Logo%20Dark%20-%20Color%20(1)-2.png)
Use the filters in the Control Panel to the left to select what you want to see in your workbook. Refine the selection of products by adding more filters. You can use any number of filters, in any combination. Remember - the content of your workbook will be a reflection of the filters you have applied in your Control Panel.
By default, your workbook will be looking at products that are ‘In Stock’ today. This means your workbook will automatically display products that are available on the market as of right now. Your workbook will also automatically exclude products that are available on Flash Sale and Second Hand Retailers sites.
You can select to view products that were In Stock on a different date than today by clicking on the Rewind Time filter (indicated by the calendar icon at the top of your filter panel) and using the datepicker to select a previous date. By selecting a previous date, you are able to see the state of the market on one specific day back in time. To read more about the ‘Rewind Time’ filter click here.

*Note: If your account’s version of EDITED does not display the ‘Rewind Time’ filter, please refer to this page for adding in Date & Timeline filters and disregard the remainder of this article. If you’re interested in accessing this feature, please reach out to your account manager, or email support@edited.com for more information.
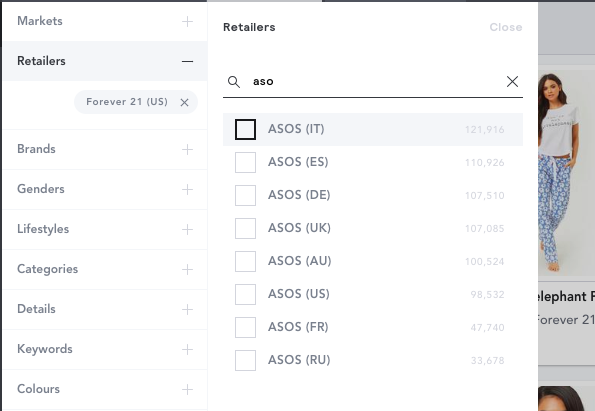
Click Retailers and start typing the name of a retailer to narrow the search.
You can use the Markets filter to narrow down the Regions and Market Segments that you're analysing.
As you type the name of a country, the list will refine to match your search.

You can then select the regions that you want to analyze by clicking on the tick boxes next to the desired region. To select Market Segments, simply click on the Segments that you're interested in analyzing.

Once you have selected any Regions or Market Segments that you want to track, the Retailers filter will update to only show you retailers that fall within those selections. The example below is showing Retailers from the Australian Mass Market.

The numbers next to each retailer shows the number of products that match the search criteria at that retailer.
To add brands, click Brands and start typing the name(s) of the brand(s) you wish to see, then select from the list.

If the name of the brand you want does not appear, you can do a Manual Search for the brand.

Use the Include or Exclude button to filter by or remove selected brands and retailers from your workbook.
For example, you can use the include filter in Retailers to select a multi-brand retailer and then use the exclude filter in Brands to exclude that retailer’s own label brands.

By default, Flash Sales and Second Hand Retailers are excluded from your workbook. To include them or look only at these kinds of retailer sites, use the Channel filter found under Price & Status. This filter also allows you to include, exclude or look only at Outlet sites.

Click on Genders to refine your selection, then click on the one you are interested in.
- For Adults you can select between Women and Men, for Children you have the option to select between Boys, Girls or Unisex, or a combination.
- In the example below we've selected to look at both Boys and Girls childrenswear. Note: The ability to separate out childrenswear by gender is only effective as of November 1st, 2014. Any products that were already 'On the market' prior to this date will be marked as unisex.
- For more information on applying filters for childrenswear, check out this article.

Specialties filter (Size & Shape): The size and shape filters within Specialties lets you choose whether you want to include exclusive plus, petite or tall brands in your analysis or not. By default, these brands are included in your workbook. Clicking on 'Exclude' will remove these brands from your results and clicking on 'Only' will mean that your workbook only includes either plus, petite or tall brands.
Specialties filter (Activewear): The activewear filter within Specialties lets you choose whether you want to include sport and active clothing in your analysis or not. Within this panel, you have the option to select between four different product types:
- Activewear: Any product which is related to, inspired by, or used in sports. This includes all athleisure product, brand collaborations and diffusion lines from fashion brands. Within activewear, EDITED has two further levels of classification: Performance and Lifestyle.
- Performance: Activewear products that are exclusively worn to play sports. This includes all product with defining characteristics like sweat-wicking, heat tech, insulation, etc.
- Lifestyle: Activewear products that are not worn when playing sports, such as athleisure and loungewear. This includes all product that is inspired by sports or worn outside of sports.
- Non-activewear: Fashion products which are not considered to be related to, inspired by or used in sports.
By default, Activewear is included in your workbook. To enable sportswear categories, you must first select Activewear and ensure Performance is also selected.


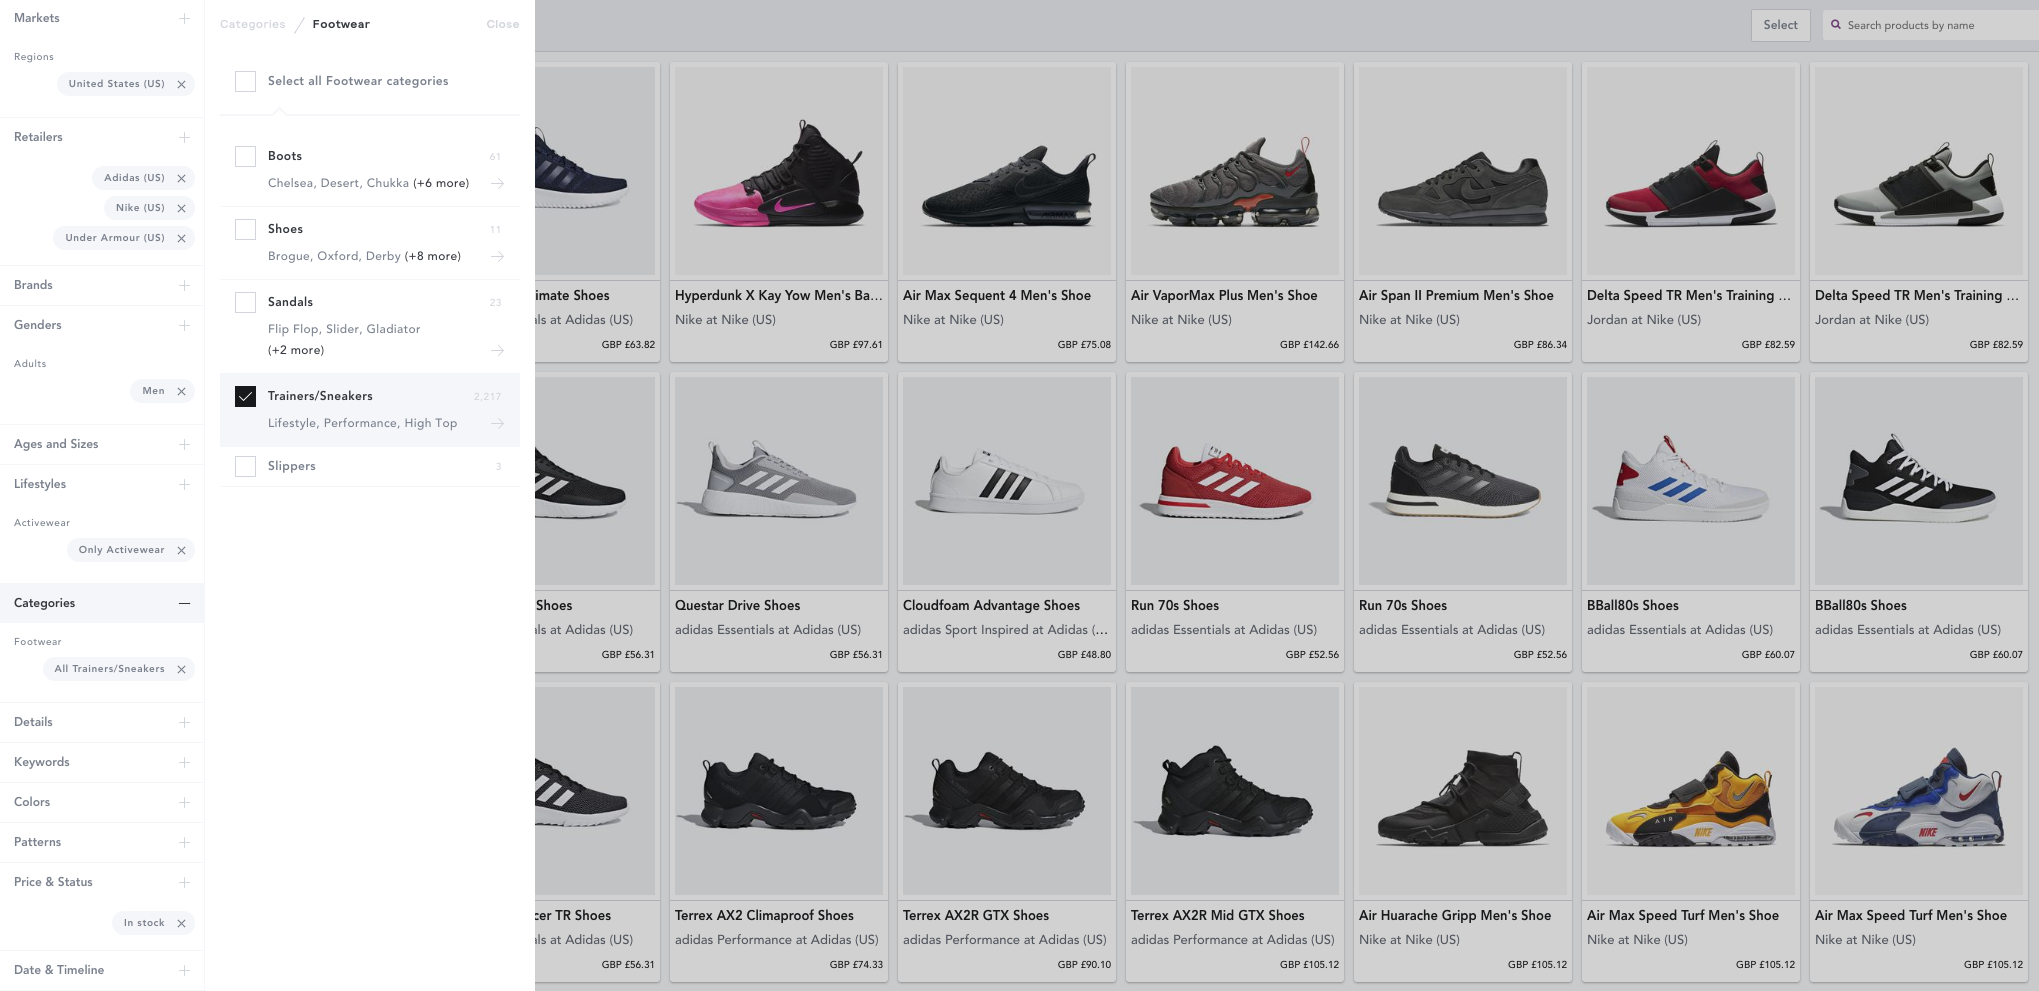
- Use the Categories filter to select product categories you want to see in your workbook. For a list of definitions of our categories see our article on Category Terminology. The numbers that you see next to the list of categories reflects the number of products within each category/sub category.

- Click on the arrow below the product numbers to drill down into a category and select from a detailed list of sub-categories. You can navigate back to all categories by clicking "Categories" at the top of the search bar.
 Click Details to search for specific product details. Select from the list or search manually by typing a keyword. (NOTE: selecting "Heeled" or "Flat" will only apply to footwear products)

Keyword Search lets you easily search for or exclude products from your workbook by keyword. For example below we have searched for dresses containing the word 'frill' but not the word 'maternity'. You can also search for information contained in the product Name, Description, Care & Composition and Offers & Promotional Info:

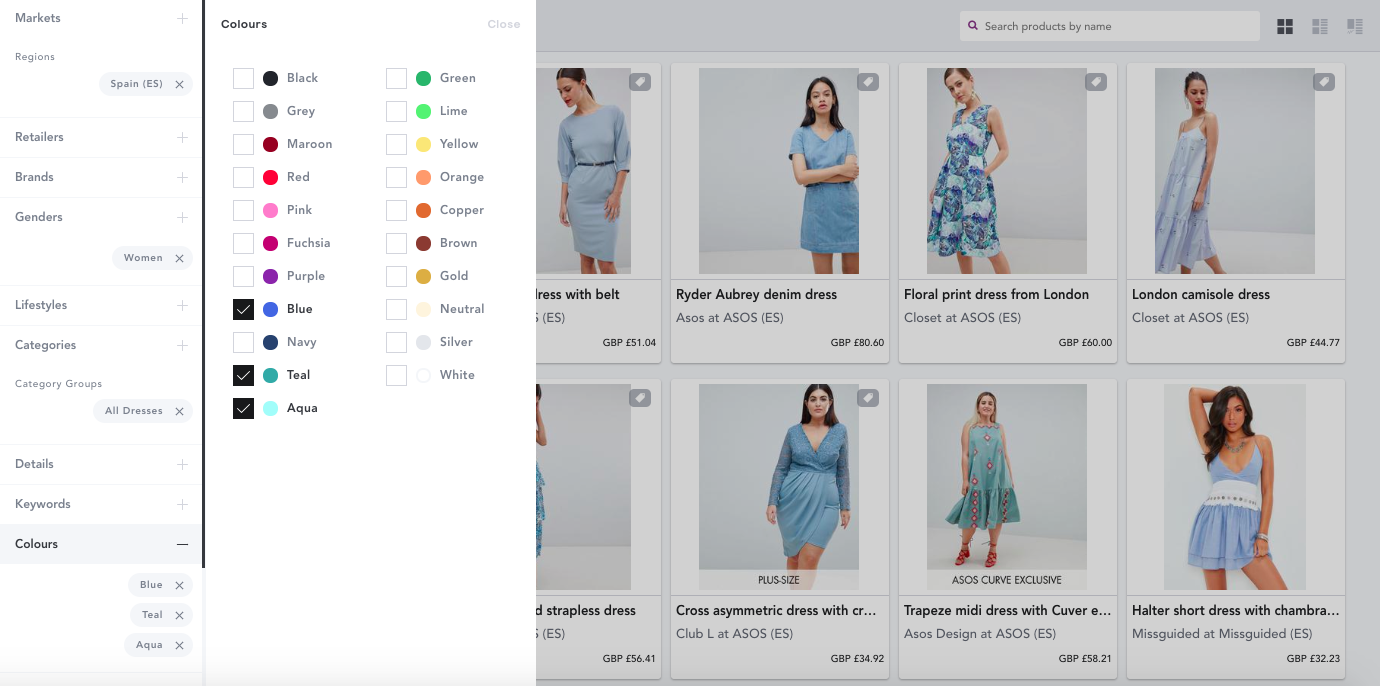
Use the Colors filter to look only at products featuring a specific colour e.g. Blue dresses:
Patterns lets you filter on products based on whether they are plain or patterned. For more information on how you can analyze this data, check out our Analysis: Patterns article

Price & Status lets you control the status of the products you see in your workbook. It is split into four sections that allow you to do the following:
Status
See products that were New In, First Sold Out, First Majority Sold Out,First discounted or In Stock during a certain period of time. Choose from the past week, past month, past 3 months or click Date Range to select a specific time frame. Select the start date and end date and the period between the two will be selected, then click 'Add' to confirm your selection.
- In Stock: All product in stock within your selected time period.
- New In: The first time we saw the product
- First Sell Out: The first time all sizes of a product have sold out.
- First Majority Sell Out: When 51% or more of sizes that we have seen available to buy sell out.
- First Discounted: The first time a product has been reduced in price. You can add as many from each metric as you like. Find out more about how to compare date ranges here.
Using these filters will allow you to rewind your market view to the assortment that meets these criteria. As with all other filters in EDITED, you can identify the Current, Full and First prices of the products we track in the app. For more information on the price statuses you can see in EDITED, check out our Pricing Terminology.
Applying timeline filters for a period greater than one day will not rewind the prices of the products to the prices they were on the dates selected. To do this, you will need to select only an individual date using the ‘Rewind Time’’ filter at the top of your filter panel. To read more about using the ‘Rewind Time’ filter together with the various Status buttons, please refer to the ‘Using the Rewind Time filter’ page.
Price
- Price range: see items that are between certain prices, or items that are greater than or less than specific prices. You can also change the currency by clicking the button and selecting from the dropdown.
- Price changes: see items that have seen a price change. Select the discount percentage you want to see.
- Advertised discounts: see items that have seen advertised discounts. Select the discount percentage you want to see
Channel
- Flash Sales: exclude, include or look 'only' at items from flash sale retailer sites. By default, this flash sale sites are excluded when you create a new workbook.
- Outlet: exclude outlet items, or view only outlet items. If neither is selected, outlet items are included.
- Second Hand Retailers: search across all second hand retailers and include, exclude or ‘only’ select them from your workbook. By default, this second hand retail sites are excluded when you create a new workbook.
Replenishment
- See items that have never been replenished, or have been replenished at least once, or at least twice.
To remove any filter in your workbook hover over it and simply click the 'x' that appears: