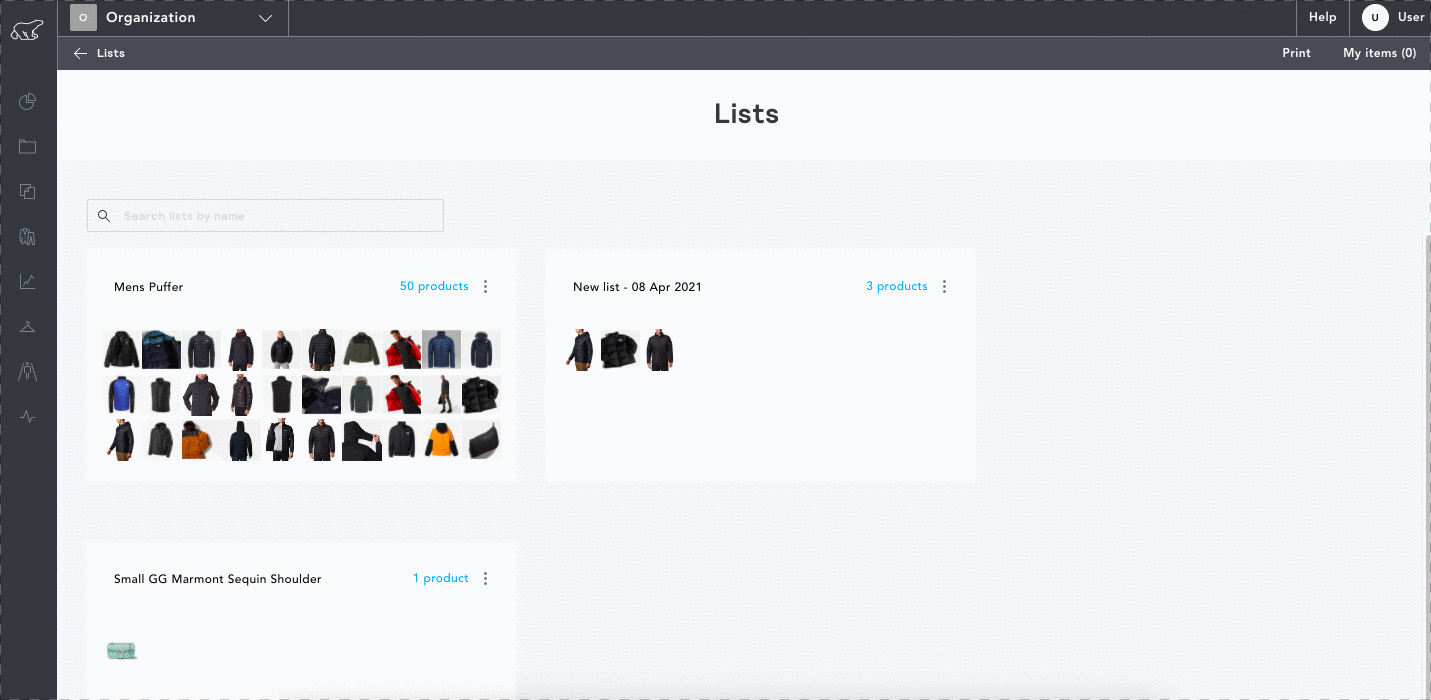
What are Lists?
Lists enable critical analysis and day-to-day workflows inside the EDITED platform. Users never have to leave the EDITED platform to perform product-level analysis and data manipulation, all can be done directly in EDITED. Lists allow you to create custom tables of data, much like a spreadsheet, but one that updates in real-time with EDITED data. In their simplest form, Lists are a place where you can save and pin specific products from Market Analytics and perform more detailed analysis on a desired subset of products.
How to create a List
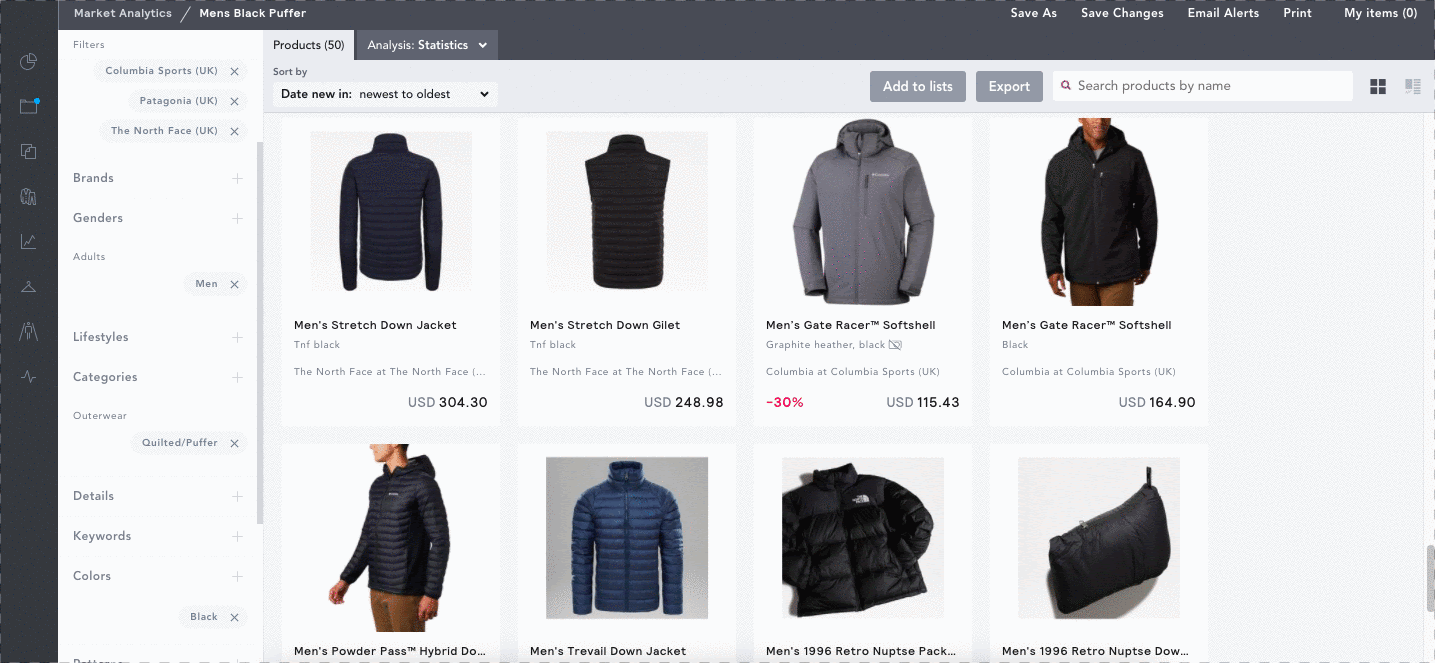
- When in a workbook within Market Analytics begin selecting products you want to add to your List by hovering over the product and selecting ‘Add to my items’.
- Once the product has been selected, you’ll see this appear in the ‘My Items’ bar on the right-hand side of your EDITED screen. If you accidentally add a product here, you can simply remove this by clicking the delete icon on the top right-hand corner of the product image within the My Items bar.
- Once you have selected all products you want to add to a List, select ‘Create a list’’ at the bottom of your ‘My Items’ bar. You can then view these products in a list straight away by selecting the link generated in your ‘My Items’ bar or by selecting the ‘Lists’ icon from your panel control bar.
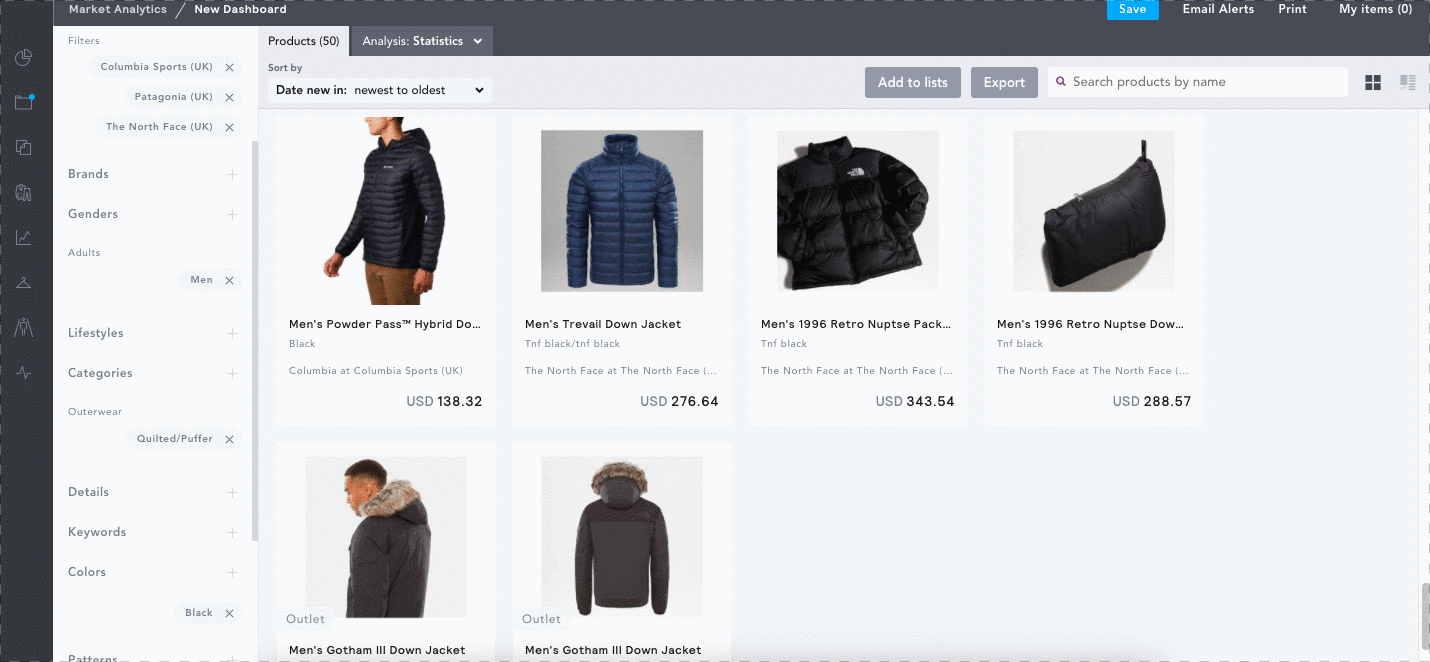
If you want to add all products within your workbook to a list, you can do this by saving your workbook then selecting ‘Add to lists’.
How to customize a List
Renaming a List
You can rename a List when in the Lists homepage by simply hovering over the current name and clicking on it. This will work in exactly the same way if you’re in a specific List and need to rename it.
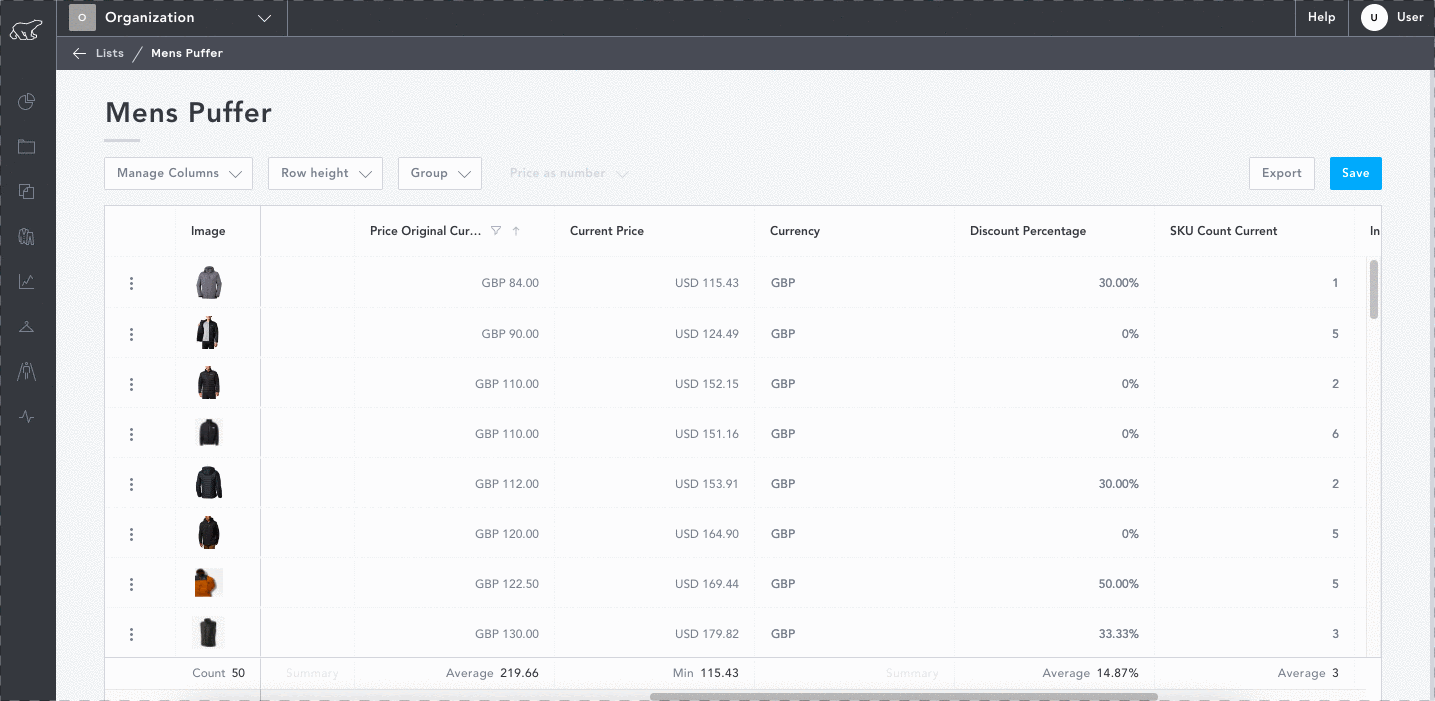
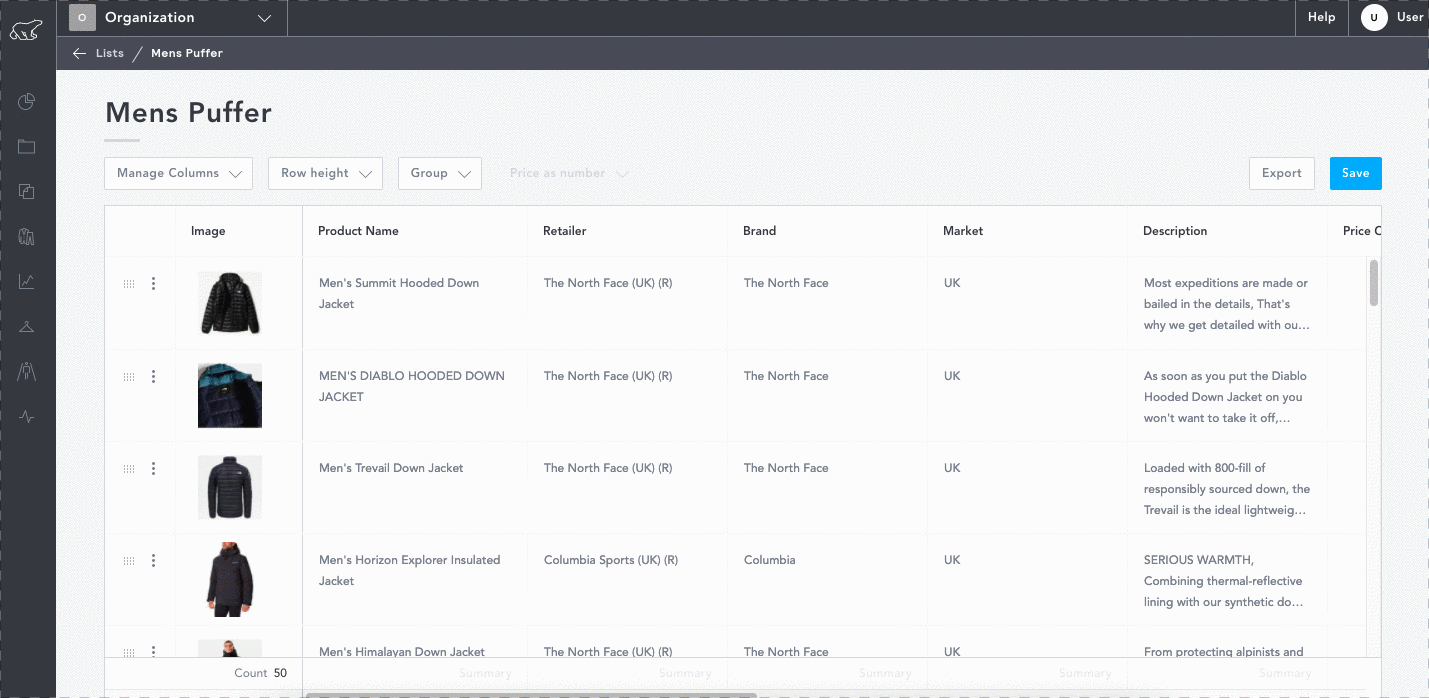
Customizing columns
Clicking the ‘Manage Columns’ filter will enable you to select/deselect any columns you want to add or hide from your List. Clicking the ‘Row Height’ filter will enable you to amend the row height to either small, medium or large. Much like in a spreadsheet, you can amend the width of columns by simply clicking the side of the column and dragging this. Selecting the name of the column and dragging this left/right will enable you to reorder the columns within your List.
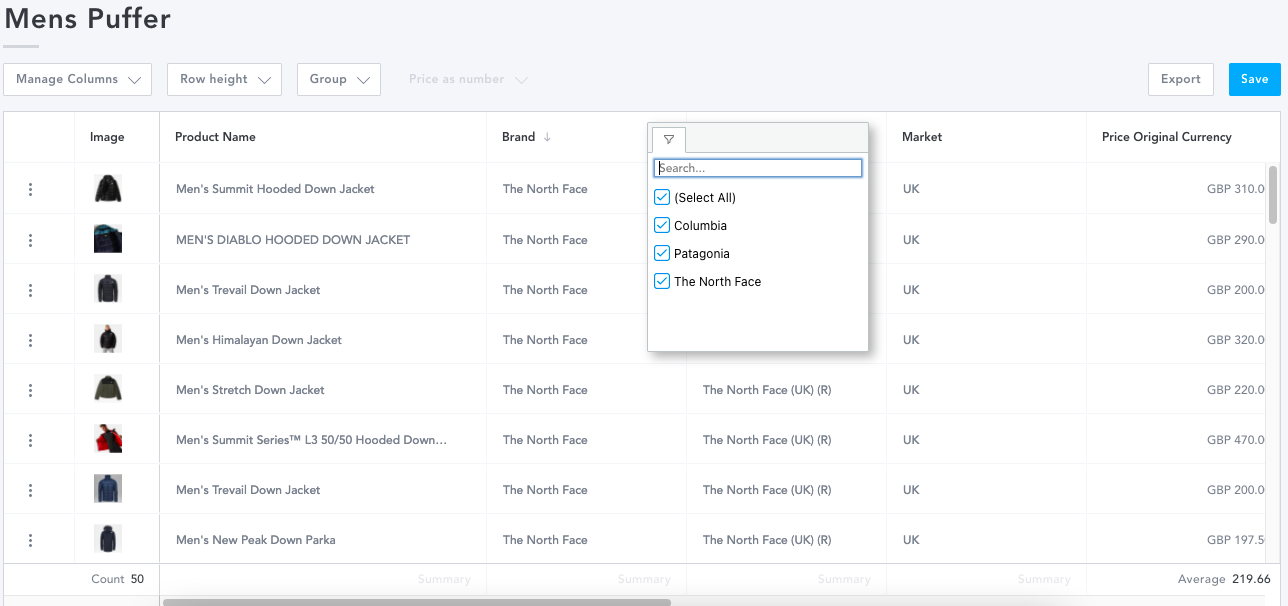
Filter products
Hovering over a column title enables you to click the filter icon and select/deselect products you want to be included in your grid.
You can also sort your products from A-Z/high-low by clicking the column title.
Group products
The group button enables you to group together specific products within your List by specific product attributes e.g. product ID or brand. This will enable you to directly compare specific types of products within your List.
Pinning a product
Selecting the more options icon (vertical three dots) within the first cell of a row, enables you to pin a specific product to easily compare to other products within your list. This will then give you a visual indicator of which prices and discounts are higher/lower than the pinned product.
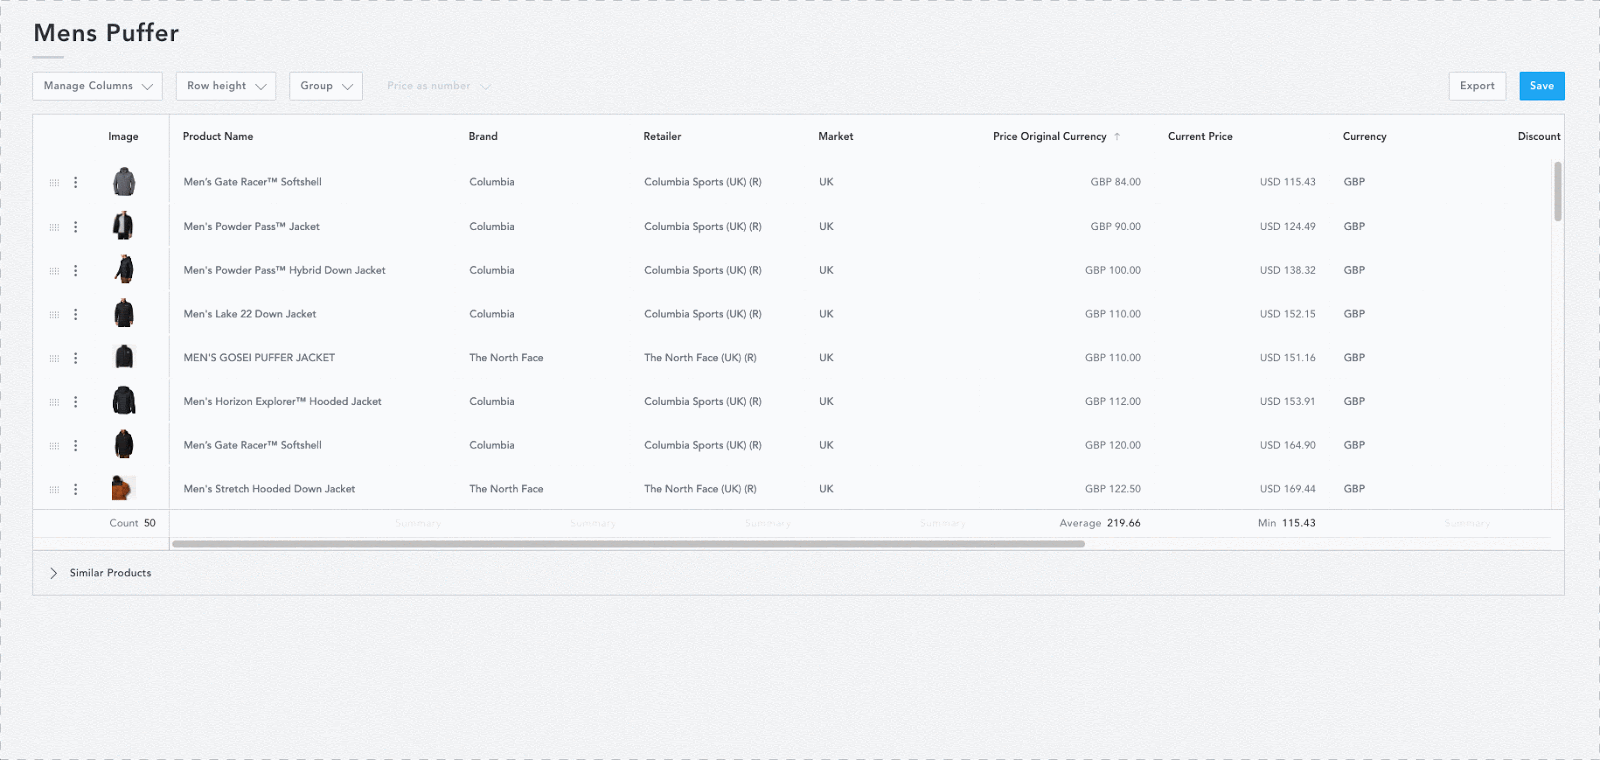
Data aggregation
Hovering over the bottom row of the List will enable you to apply some data aggregations to each column. For all columns, you can analyze the count (the number of pieces of data) or unique (the number of different pieces of data). For numerical columns, you can also analyze the min/max/average and sum, showing totals for prices and other numbers.
Exporting a List
You can export a List straight into excel by clicking the export button towards the top-right hand corner of your List. Remember if you’ve made any changes to the products included, filters and/or columns of your List, click ‘Save’ before exporting to ensure these changes are reflected in your export.