Signal is the name of the Automation tool used in the following areas of EDITED:
- Customers > Segments & Campaigns
- Pricing > Pricing Rules
- Site Merchandising > Sorting Rules
You can export your analysis via Email or API.
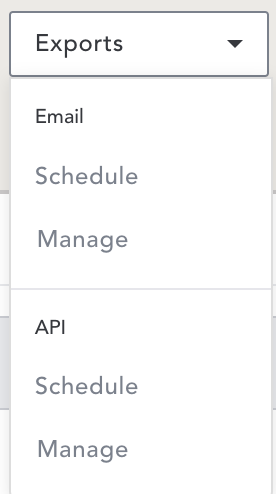
- Click Exports.

From this view, you can Schedule or Manage the Email and API export as required.
Exporting Via Email
To schedule and receive your report via email, complete the interactive tutorial below or read the following instructions.
This tutorial example uses a Pricing Recipe.
Here's an interactive tutorial
** Best experienced in Full Screen (click the icon in the top right corner before you begin) **- Click Schedule via the dropdown.
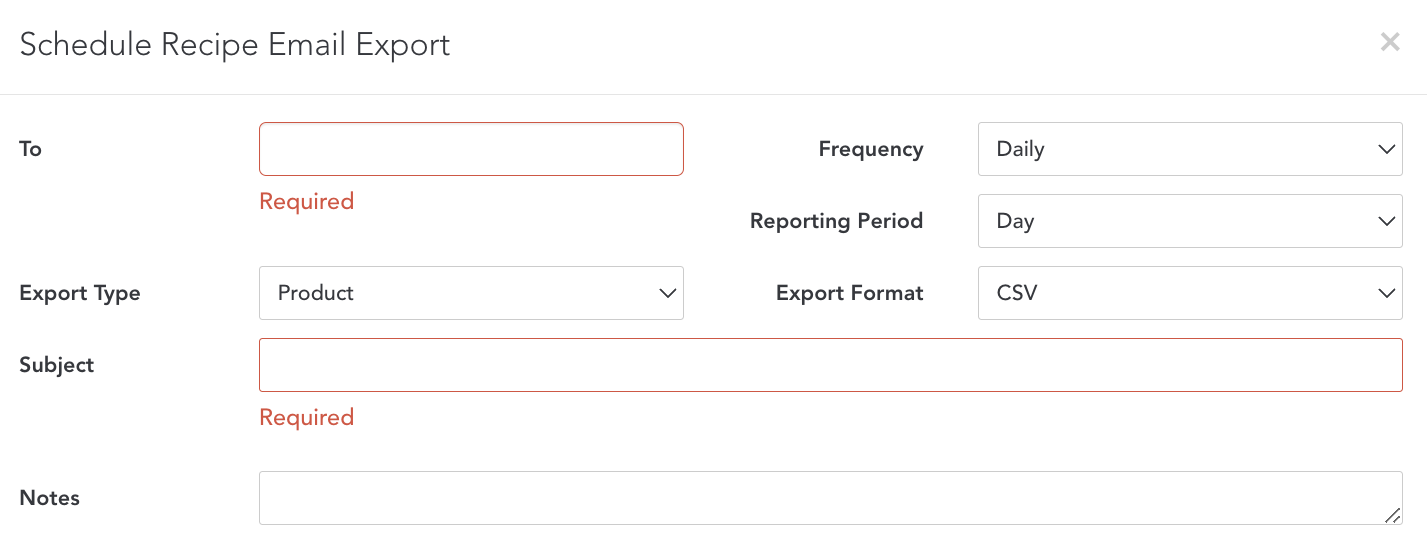
Customize how this email will be scheduled in the following ways.
- Add email recipients into the To textbox.
- Choose the Export Type.
- Product
- Product Selling Location
- SKU
- SKU Selling Location
- Parent Product
- Parent Product Selling Location
- Option
- Option Selling Location
- Customer
- Choose the appropriate Frequency for which the email will be sent.
- Daily
- Weekly
- Monthly
- One-Time
- Choose the Reporting Period for the data that will be exported.
- Day
- Week
- Month
- Week to Date
- Month to Date
- Quarter to Date
- Year to Date
- Choose the appropriate Export Format, either CSV or TSV.
- Type an email subject into the Subject box.
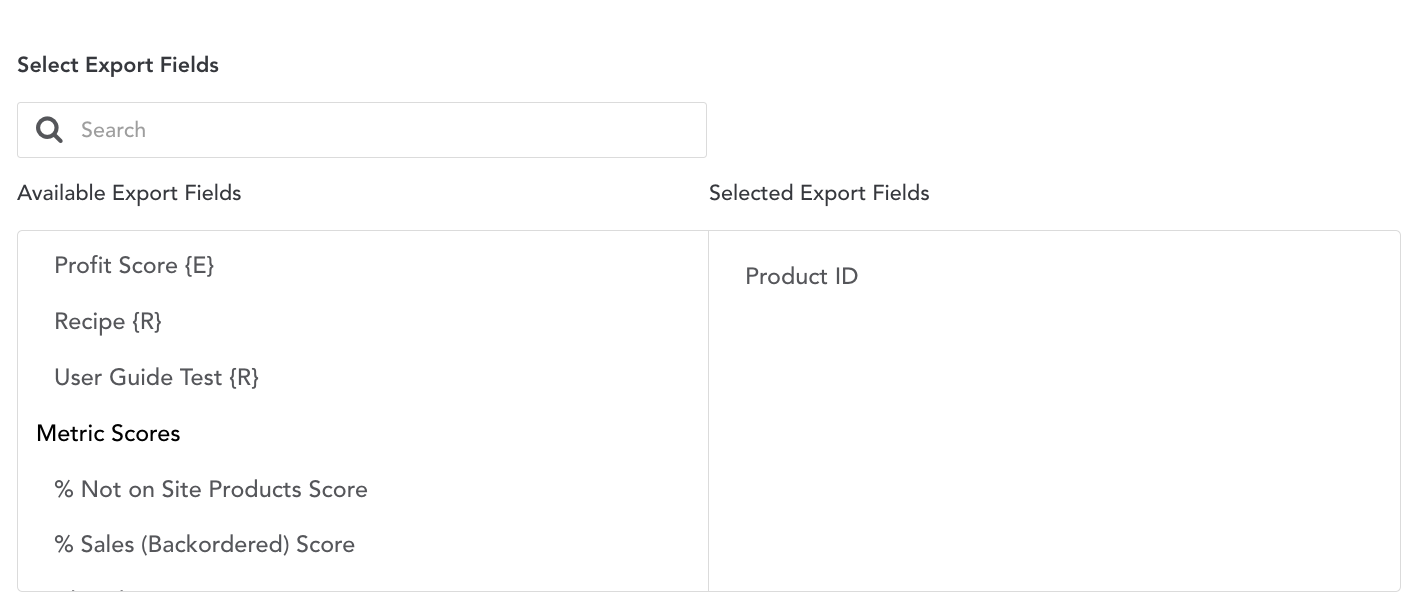
Select the Export Fields to be included in your analysis. Clicking the fields will move them to the right-hand column and include them in your export.
- Choose Recipe Scores from existing recipes that have been created, e.g., Profit Score (E).
OR
- Choose individual Metric Scores from additional Metrics, e.g., % Not on Site Products Score.
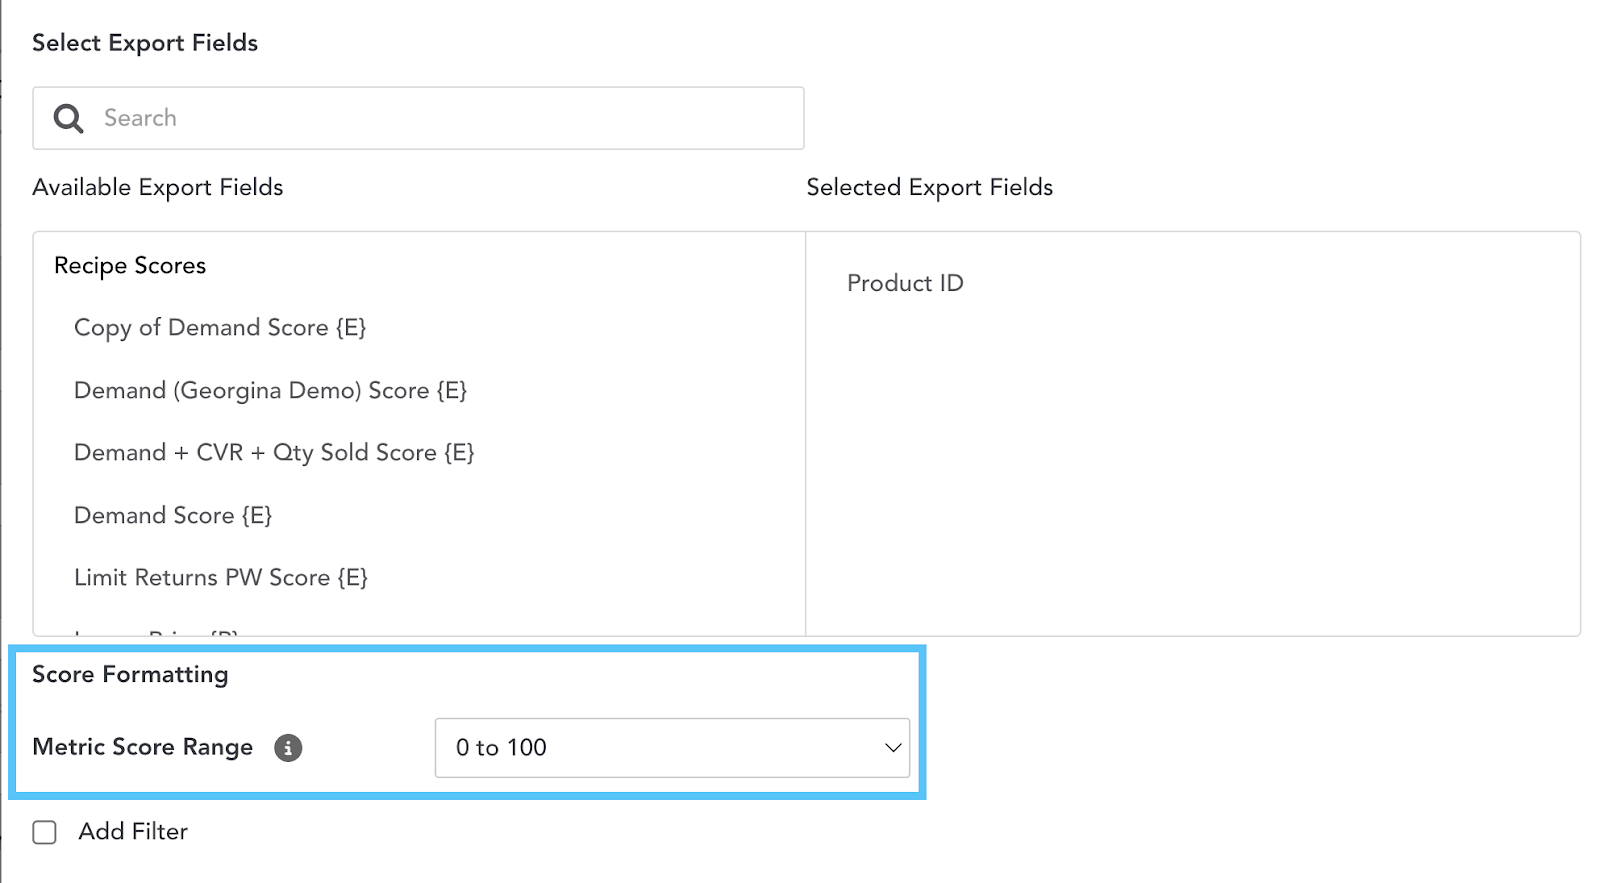
- Select your preferred score formatting through the Metric Score Range dropdown, the normalized scoring range. Select the range that makes the most sense to your current working methods, e.g., 1-100.
You can then choose to add filters as required.
- Check the Add Filter checkbox.
- Add your field or metric into the first dropdown.
- Add your rule, e.g., "Is, Is Not, greater than, equal to," in the second dropdown.
- Type in the value to the third textbox eg. Dresses.
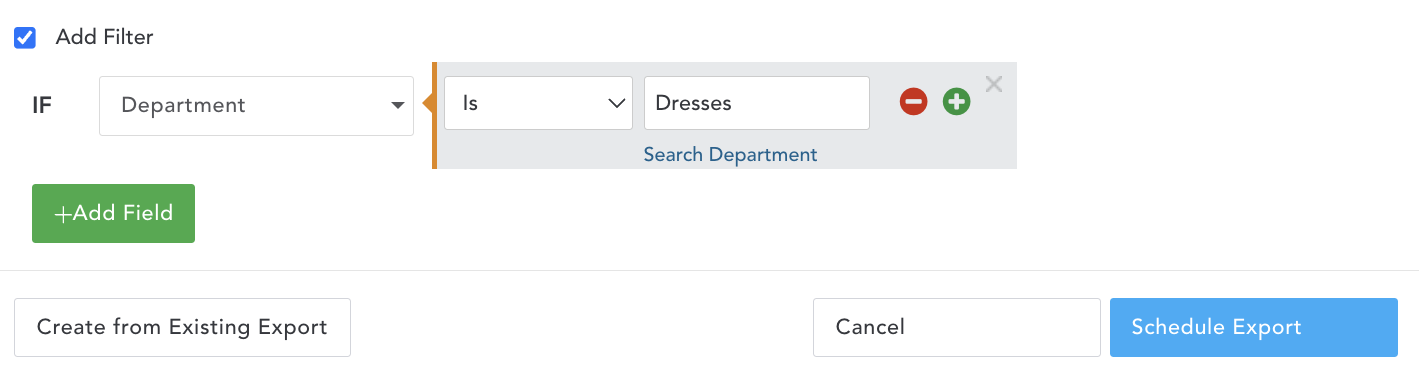
Click the Schedule Export button in the bottom right of this email template to send the email.
Exporting via API
EDITED recommends working with your dedicated Implementation and Customer Success team to work through the best process for scheduling an Export via API.
To schedule and receive your report via an API, complete the interactive tutorial below or read the following instructions.
This tutorial example uses a Site Merchandising Recipe.
Here's an interactive tutorial
** Best experienced in Full Screen (click the icon in the top right corner before you begin) **
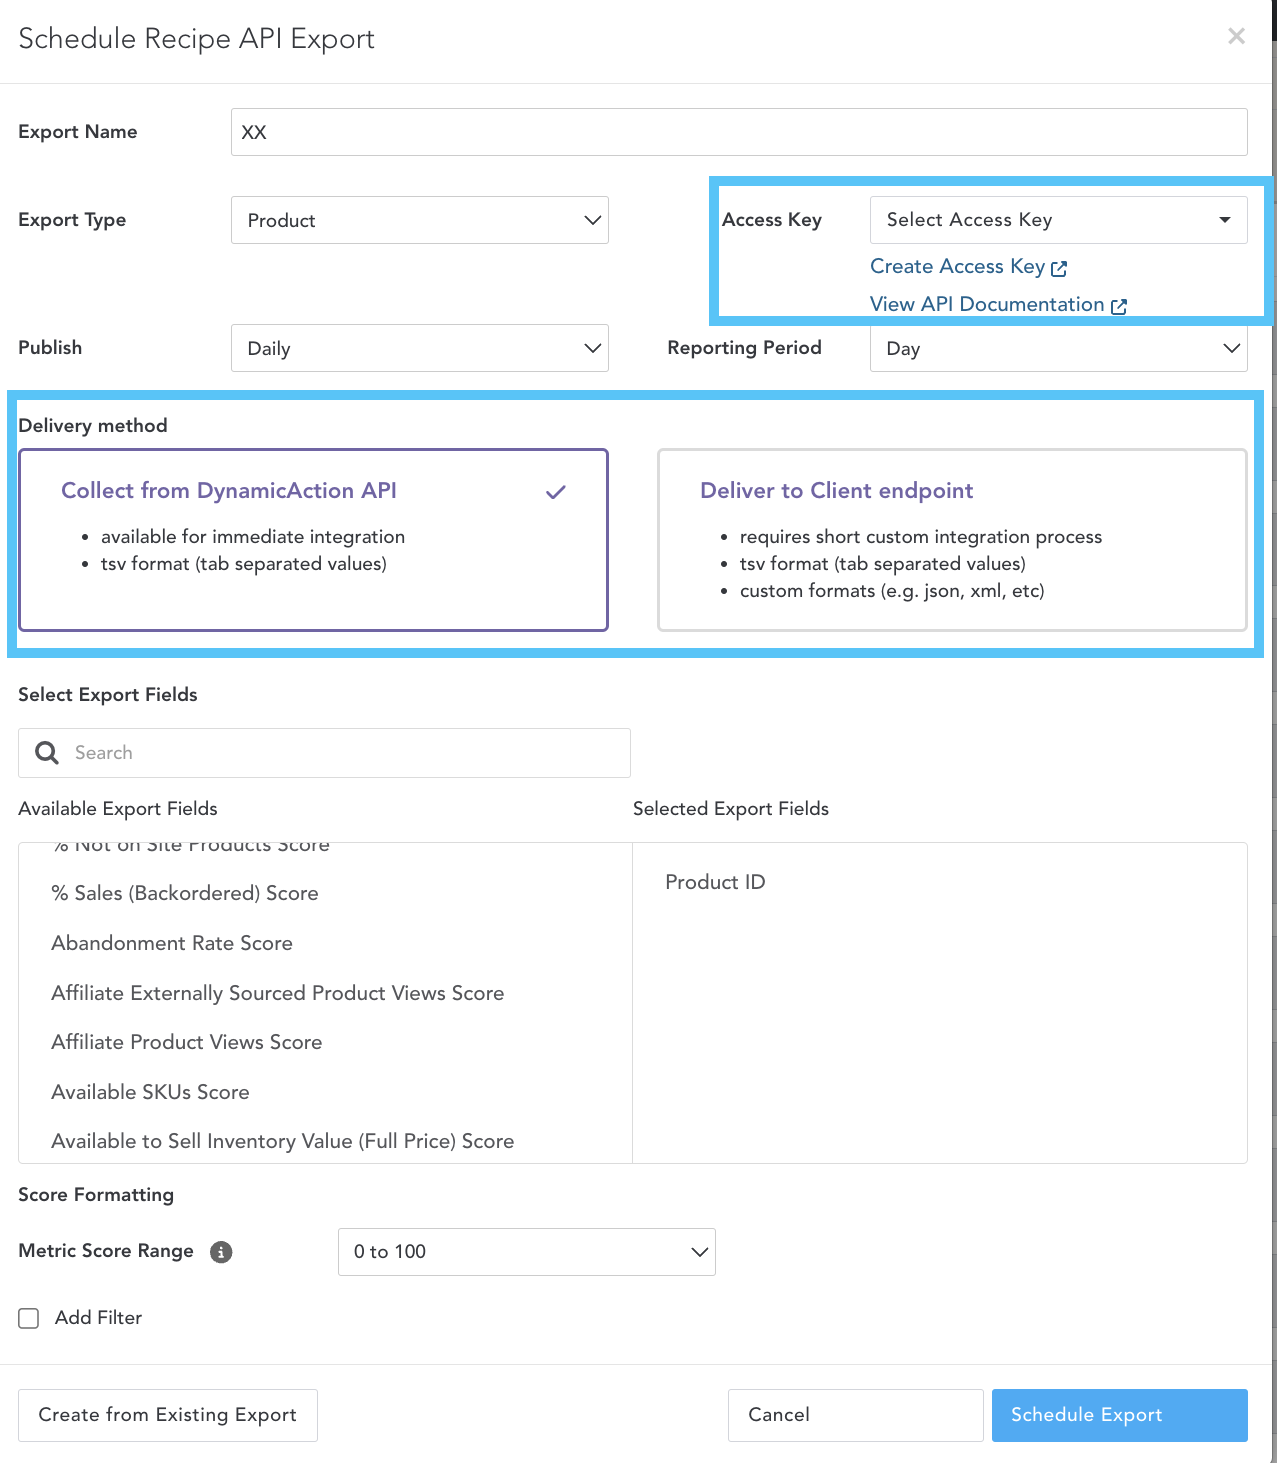
Exporting via an API will have a process similar to the one in the email above.
The main difference is that you need to select an Access Key.
Also, you must choose between two Delivery Methods for the API.
- Collect from Dynamic Action API
OR
- Deliver to Client Endpoint.
For both requests, EDITED recommends working with your dedicated Implementation and Customer Success team to work through the best process.
How Do I Manage Email & API Exports?
To manage the Email or API exports you are scheduling, receiving, or owning.
- Click Manage via the export dropdown.
You can choose between three tabs in the Email Export view.
- My Emails
- All Emails
- My Subscriptions
And two, in the API Export view.
- My Exports
- All Exports
To manage your Email or API exports
- Tick the checkbox next to the Email/API export name of choice.

From this point, you can choose to action the following:
- Schedule Recipe Email/API export
- Edit the Scheduled Email
OR
- Delete the Scheduled Email

If there are many email or API exports, remember that you can use the search bar to quickly narrow down what you need to manage.